The subject of today's review is another "Third Party" release (I have an explanation of the whole Third-Party scene in my review of Mech Ideas Demolition Crue toys). As is commonly the case with Third Party toys, we have a modernized version of an old Generation One (or "G1") Transformers character.
FansProject is one of the major players in the Third Party market, and they are regarded as having some of the best engineering of the various groups making such toys. Thus it is often the case that their toys are well-designed, complex, and usually quite sturdy. CA-09 Car Crash is no exception. He comes from FansProject's Causality line, which is made up of smaller transforming characters. Car Crash is the first release in a set of five figures that will replicate the original Transformers G1 Stunticons, a subgroup of the Decepticons who could not only transform from robot mode to car or truck mode, but also combine as a group to form a much larger - and exponentially more powerful - robot, Menasor.
Car Crash is essentially a modernized and updated version of Breakdown, one of the Stunticons. His character is supposed to be extremely paranoid and anxious, and as such when in vehicle mode, he gets so overwrought that he winds up with all sorts of mechanical problems. As part of Menasor, he usually forms the lower right leg.
On to the toy itself. Car Crash is a fairly small figure at only about four inches high. His color palette is dominated by the white of his automobile mode, along with a deep blue, medium grey, and some silver and red highlights. This fairly well replicates the look of his G1 self.
His face is a vivid red with yellow eyes. The paint applications on Car Crash are nice and crisp, and the plastic details are likewise sharp.
FansProject does a fantastic job of mixing in various shapes and colors to provide a visually appealing robot mode.
Details are everywhere, but FansProject's design sense is right-on in leaving certain portions as "white space" (no pun intended) to give the eye a rest.
As is often the case, a side view of a robot is not usually its best.
Car Crash has a fairly large backpack of sorts, though he lacks much of the hollowness that usually goes along with a rear view of a transforming toy.
In this case, the hollow spaces are covered with panels that mask where various parts eventually fold into.

I love the way FansProject does hands. No static fists here - instead we have a more relaxed hand shape that is still able to grip a weapon easily.
And here we have the weapon. It's a small rifle with a couple slot-shaped holes through it. These are used later to store the weapon when Car Crash is in vehicle mode.
The rifle splits into two parts when stored.
With an impressive array of clever joints, Car Crash is able to assume just about any kind of action pose you can think of.
Balance is good enough to allow for him to kick out and remain standing.
Car Crash can get both hands on his rifle. Note the tires on the shoulders are a bit wider at the outside than on the inside. This outside portion is the only part that actually rotates.
He can also get into a kneeling position easily.
Articulation on the ankle joints is good enough for Car Crash to assume a very wide-legged stance and still have both feet planted firmly on the ground.
A neutral stance still looks good on Car Crash. His proportions are excellent, and he doesn't seem to have the usual robot design problem of over-wide shoulders.
Transformation to vehicular mode begins by removing the weapon from his hand.
Next, pull his upper torso upward to form a gap at the waist.
Moving to the arms, you can see a small gray tab of plastic that appears as if it can move along a slot in the forearm.
This helps the arm track properly as you slide the forearm up to meet the upper arm.
The next steps involve getting the upper shoulder parts joined to the lower arms.
Note that there is a double joint inside here. One end is a swivel, and the other a ball joint.
This joint allows you to bring the part around easily to where it can meet up with the arm's outer body panel.
Tab the two pieces together like so. Replicate this process for the other arm.
Car Crash should now look like this.
Turn him around and rotate the backpack up on the gray double joint that you see here.
Rotating the part fully upwards will bring it in line with the rest of the rear of the car.
You can see a set of tabs and slots that need to be pressed together.
Snap the parts together to complete the rear of the car.
There are similar tabs and slots near the rear side windows.
Tolerances here are quite tight and you need to massage the parts together a bit in order to get everything just right.
This section is now complete.
Flip Car Crash over to see where his head and chest are. Note that the tabs on the backpack now flank his face.
Mount the two halves of his rifle as shown. The tabs fit in very snugly. So much so that it can be hard to remove them later on, so be careful that you take your time in doing so.
The ends of the rifle form exhaust pipes.
Shifting to the legs, look at where the wheels are embedded into their lower portions.
Flip these out as shown. If you transform everything right, manipulating the feet into place will pop the wheels out into this position, but I like to make the move now.
Switching to the feet, you need to rotate the toes and heels together.
This part is a bit scary, and can feel as if you're going to snap the joints inside the foot.
However, the parts will move properly and fit snugly together. Note another slot and tab at the rear of this part.
Snap the tab and slot together and one half of the front of the car is complete. Follow this procedure for the other foot as well.
Once the feet are in place, the rear of the legs should look like this.
Before you can move on, you have to work on the knee joints, and disconnect a white pin from a hole in the side of the knee joint. You can see the pin below.
Basically, you have to flex the plastic a bit here to pop the pin out of the hole. Once done, it should look like this.
The blue back panels on the lower legs need to be opened up fully. Now you can see the way that the inner mechanism for transformation is formed.
Begin to swing the whole mechanism down into the hollow portion of the lower leg.
Once the inner mechanism is in this position, you can begin rotating the lower legs inward.
Inwardly turned, you will then need to close up the blue flaps.
As these flaps close, you can bring the two halves of the front of the car together. Again, there are a series of tabs and slots to ensure that the parts fit properly.
Almost there!
Once fitted together, you may need to give everything a squeeze to ensure that the seams close up as much as possible.
Lastly, push the front and back sections of the car together. This closes up the waist joint that you expanded earlier.
The car mode is sporty, and reminiscent of the Lamborghini Countach that the G1 character changed into (quite a few G1 Transformers were Lamborghinis as well).
I'm not a big fan of white paint jobs on cars, but Car Crash's vehicle mode is still pretty sharp looking. The little splash of red on the hood, and blue on the running boards helps to add just enough color.
A rear view shows the portion of the car where I feel that FansProject failed a bit.
The middle section of the rear of the car doesn't seem to integrate well with the rest of the design. The hinges are far too visible, and the bars that run towards the rear don't maintain the lines that have otherwise been established. Why was the hinge molded in gray, instead of white? There may have been stability issues being addressed with some of these design choices. It's not terrible by any means, but just not to my liking.
From the side you can still see the hinges a bit too much. The wheel design, however is quite nice. These are the tires I mention above where only the outside rotates. However, they spin well, and the whole car will roll freely on any flat surface.
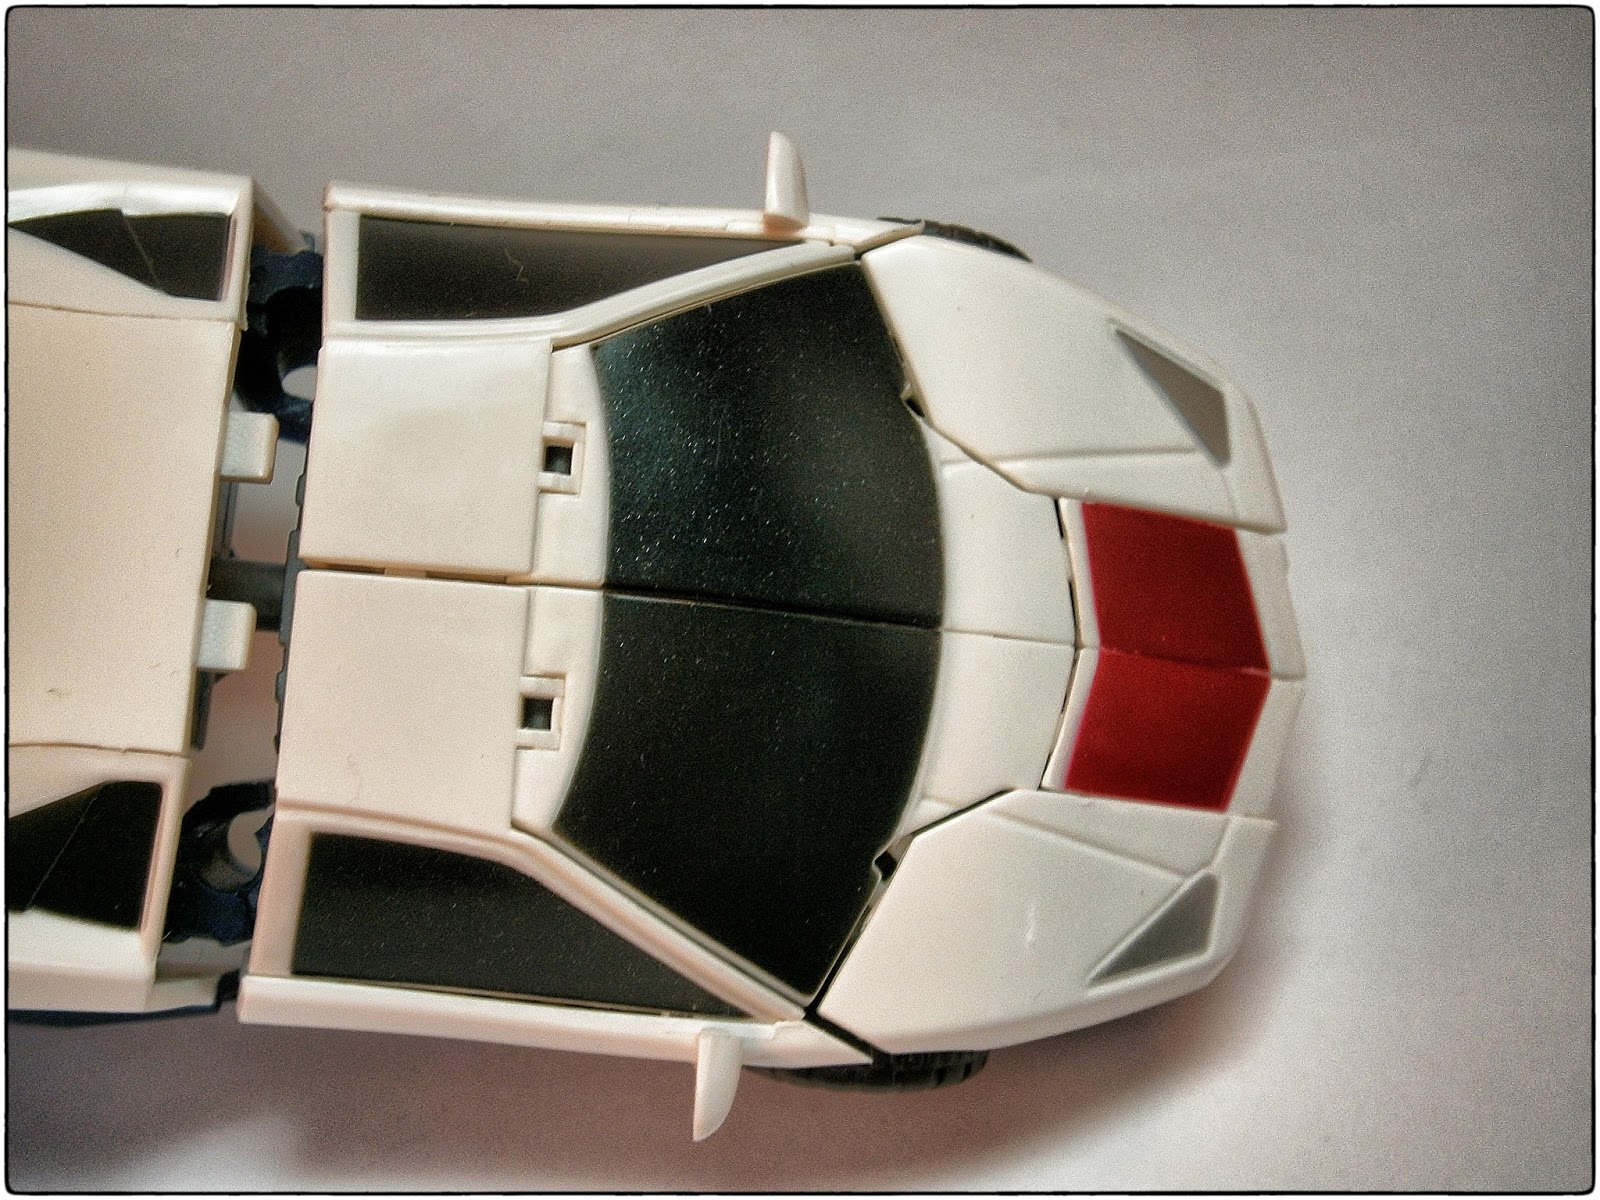
One last view from the top.
The under-body shows a number of holes and ports that are clearly intended for Car Crash's transformation into a component part of FansProject's version of Menasor. You can see his face here, but that's fairly standard for transforming car robots.
Even if you weren't going to purchase any more of the figures that will eventually make up the whole Not-Stunticon team, Car Crash would be worth picking up. I really like the toy in both modes, and articulation is top-notch. Colors and details are well-defined and artfully placed. I think it's an excellent update to the original toy, and am glad to have it in my collection. Lastly, this is just plain good "hand candy." Whereas I am often glad to have a simple transformation on a toy, the complexity of Car Crash does not diminish the fun. All parts fit well, and there's nothing really frustrating about the design. Nice job, FansProject!